How To Clean Your Oven Effectively

You may have bought a fantastic oven that looks shiny and new, but not cleaning your oven for a while will soon cause food, fat, and grease to seep down to the bottom and form a crusty surface. Not only does this look bad, but it can also cause unpleasant smells to start coming out of your oven, which might even affect the taste of your food.
While tackling a large mess will take a while, regular cleaning can help prevent this and allow you to clean out your oven much more easily. It's important to get a handle on the situation before it gets to a point where the mess looks unmanageable.
We’ll talk more about how often you should clean your oven a bit further on in our article, but for now, let’s take you through everything you need to know to learn how to clean an oven properly.
What Should You Clean Your Oven With?
There are plenty of different degreasing sprays and cleaning pastes that you can buy for your oven, allowing you to clean it with relative ease. The chemicals used in these commercial cleaning options have been tested and won’t damage your appliance in any way. Moreover, they won’t leave any lingering toxic chemicals after you finish cleaning.
However, many people still prefer to the more natural and DIY options, which are equally as effective and perhaps easier to come by.
The two solutions we recommend using are white vinegar in a spray bottle and baking soda. However, suppose you’d prefer to use commercial products instead of making your own cleaners. In that case, all you have to do is get a commercial degreaser spray instead of the vinegar and an oven-cleaning paste instead of baking soda.
However, if you go the commercial route, make sure to turn on the oven after you’re done cleaning to make sure that any chemical residue has burned off and then leave the door open for about an hour or so.
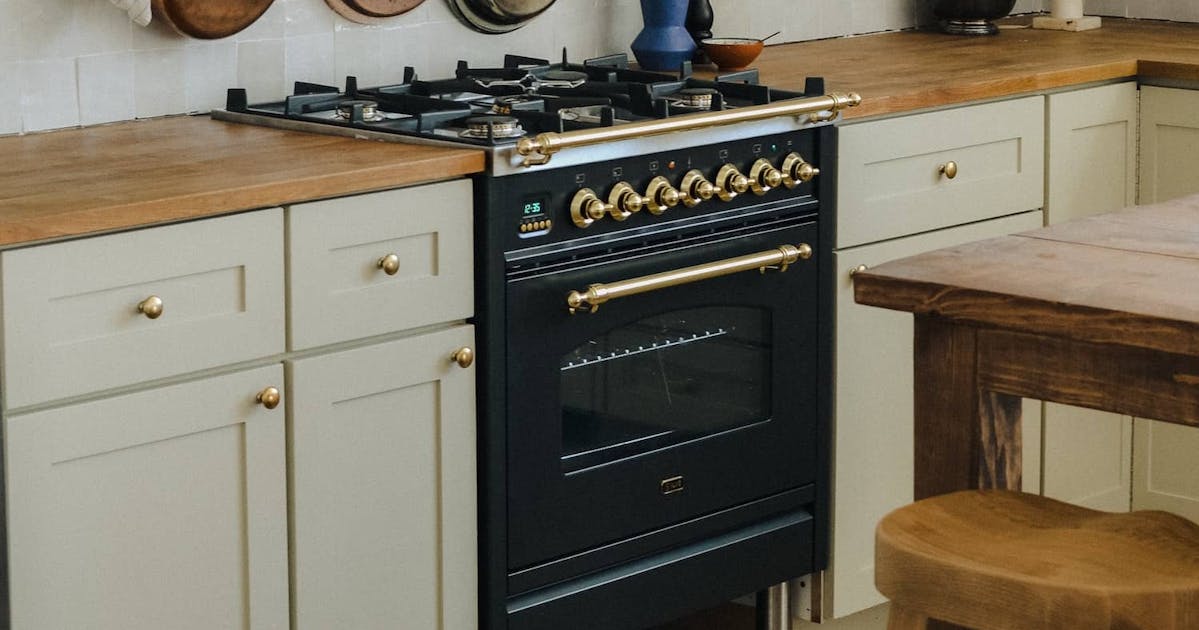
The Cooktop
We’ll start our guide on how to clean an oven from the top since the cooktop is the easiest area that you can clean.
First things first; get a bit of white vinegar in a spray bottle and a sponge.
Spray the vinegar on the surface and let it sit for a few minutes before taking your sponge and scrubbing the cooktop with the rough side. The acidic nature of vinegar breaks down most fat and grease, so it acts as a great cleaning agent.
If there are still some grease spots left, just go over them with the spray bottle again, and this time, add a bit more elbow grease when you use the sponge. The rough side of the sponge is effective enough if you just use enough vinegar and force. Don’t use steel wool since it can scratch the glass-ceramic surface that most cooktops are made of.
Many people usually use steel wool to clean rougher steel burners that you find on gas burners, and while it’s useful for scrubbing off any food or grease residue, a sponge will suffice here as well.
The Outside
Aside from the cooktop, the only other outside parts that need cleaning are the knobs and the tray drawer below the oven door.
The knobs themselves should be fine, but you might want to get an old toothbrush and gently scrape around the edges in order to scrub off any gunk.
You don’t need any cleaning supplies here; just give the knobs a gentle scrub to ensure they’re turning alright.
If you have a drawer underneath the oven door, all you need is a bit of soapy water and a sponge to clean the surface and get rid of any stains or visible spills. While you have the water and sponge in hand, you can also give the rest of your oven a once-over as well.
This takes five minutes, and it’s optional, but it can allow you to get rid of any unsightly water lines or grease marks.
The Glass
The outside of the glass door is easy to clean, and you can simply stick to the soapy water that you used for the other parts of the oven. Alternatively, you can also use the white vinegar bottle since you already have it, and as we mentioned before, it’s a great degreasing agent.
After you’re done with the front, open the oven door to start on the inside. Most ovens have two layers of glass on the door, and if your oven is the same, you might want to detach the inside pane. Usually, hooks or catch releases on the side of the door allow you to remove the inside pane, but if you’re unsure of how to find them, you can look up more detailed instructions online on the exact oven model that you have.
After you’ve removed the inside pane, take it to the sink or to a tub filled with water and dish detergent and scrub the glass until it shines. Before you put the pane back in place, get a sponge and the vinegar spray bottle, and clean the inside of the outer pane as well. Dry both with a clean towel.
Many people still see stains on the glass even when they clean both sides of the oven door because they forget to detach the second layer of glass and clean off the grease that has seeped in there. Luckily, glass is very easy to clean, and all of the marks fall right off with just a bit of water and scrubbing.
The Trays and Racks
Aside from the bottom of the oven, the trays and racks will require the most cleaning since they’re usually covered and grease and fat. Before you take them out of the oven, put a bit of dish detergent in a tub full of water and stir until soapy water forms.
Once you take out the trays and the racks, get a scraper or a bit of steel wool and scrape off any congealed fat from the items in question. This is where you can’t replace steel wool—it makes things that much easier than using the rough side of a sponge.
After that, place the trays and racks inside the soapy tub and let them sit for a few hours. Then, get a sponge and a clean tub of water and start scrubbing the racks and trays until all of the residue comes off.
The Inside of the Oven
Before you clean the oven, scrape off all of the fat and grease on the bottom and on the side walls. Once you’ve collected all of that, take your baking soda and some water to make a cleaning paste.
Mix half a cup of baking soda with a quarter of a cup of warm water and stir it. This should come together in a paste-like consistency, but if it’s a bit more watery or hard than it should be, then adjust the amount of baking soda or water accordingly.
Once the paste is done, take a sponge and spread it on the side, back, and the bottom of your oven, making sure that you don’t put in on the heating elements. You might have a bit of a harder time getting inside the rails on the sidewalls, but there should be enough room to come in from the top and the bottom.
Once the paste has been applied, wait five to six hours or leave the oven overnight. That will allow the enzymes in the baking soda to break down all of the congealed gunk. When enough time has passed, get a wet sponge and clean off all the leftover paste.
The final step is taking your vinegar spray bottle and spraying it all over the oven. The vinegar will react with the leftover baking soda and cause it to foam. Then, simply wipe away the foam, and you’ll be left with a much cleaner oven.
Alternatives
Aside from the commercial and DIY cleaners, there is another way to clean the inside of your oven. This method involves getting two oven-safe bowls, filling one with hot water and the other with a cup of ammonia.
Once the water has boiled and you’ve poured it into the first bowl, fill the other bowl with a cup of ammonia, place both in the oven, and turn the heat to 170 degrees. After 30 minutes, turn off the oven and keep the water and the ammonia exactly where they are for around five to six hours or overnight.
The ammonia and the boiling water should have mixed and loosened all of the grease and fat on the walls by then. After that, simply remove the bowls from the inside and spray the inside with white vinegar. Then, go over all of the walls and the bottom of your oven with a sponge.
This method is definitely easier than using a paste, but it leaves behind a very unpleasant smell due to the ammonia, and the oven will need to be aired out for quite a long time before it goes away entirely. This will also cause the rest of your kitchen to smell as soon as you open the oven as well.
While we don’t personally like this method, you’re free to go for it if you don’t want to spend time making the baking soda paste (and you’re not all that bothered by the smell of the ammonia).
How Often Should You Clean Your Oven?
The simple answer is that there is no set interval to clean your oven. It all depends on how often you use your oven in a week as well as the sorts of meals you prepare.
The only real way to tell if the walls need cleaning is through a quick visual inspection, but even if you use it three times a day, we still think that you don’t need to completely clean your oven more than once every two or three months.
However, you can still soak the racks and trays in water once a week, and you can even clean the cookers every day if you want to. These components are incredibly easy to clean, and they don’t take much time, so you don’t need to wait until you clean your oven completely in order to do them.
We’ll leave it up to you how often you clean your oven, but keep in mind that leaving it alone for half a year or more will just cause a larger mess that will be harder to clean. While cleaning your oven once a month might be too much, forgetting about it entirely isn’t advisable either.
The Self Cleaning Function
Unlike dishwashers, self-cleaning functions on ovens have nothing to do with water and are instead just another heating function in the oven. The self-cleaning function heats the inside of the oven to such a degree that all of the accumulated grease and fat simply burns away and turns into ash.
All you really have to do once you turn these functions on is wait for them to finish and the oven to cool, and then simply collect the ash that has accumulated inside.
It sounds incredibly convenient, and it is; however, the massive drawback of the self-cleaning function is that it’s only present in the more high-end ovens that usually cost double the amount that you'd usually pay for a standard model.
If you’ve got the money to spare, these ovens can really reduce the amount of work you need to put in to clean them. But in our opinion, this single feature really isn’t worth all of the money that you’ll need to pay in order to skip a bit of work.
Conclusion
As we mentioned before, it’s not necessary to clean your oven all that regularly, and you should be fine as long as you only do it once you start to notice that the grease stains have really started to accumulate on the walls and under the trays.
The good news is that now that you know how to clean an oven, you can get rid of any accumulated residue anytime you need to.